Chimney
A damaged flue cap can be repaired by just about anyone, if you follow some simple instructions. The procedure itself is simple, but time consuming.
Tools and materials needed
- Caulk
- Caulk applicator
- Pair of pliers
- Trowel
- Cold chisel
- Chimney brush
- Hammer
- Screwdriver
Tighten screws
Problems with a flue cap can be as common as the loosening of the screws that keep it in place.
Caulk flue cap leaks
If the flue cap has leaks in it, you just need to caulk the leaks using a caulking gun. Consulting a manual is strongly recommended. When the caulk dries, the leaks shouldn’t be a problem anymore.
Solving dents
A copper or steel flue cap can suffer dents over time. You can use a hammer to straighten the dents out or even just pliers if the dents are small. If the dents are too serious and seem impossible to repair, it is strongly recommended to replace the cap.
Damaged mortar
A mortar based flue cap will suffer from deterioration over time. Using a hammer and a chisel, break the damaged mortar, and then apply new mortar using a trowel. Consulting a manual related to this is highly recommended.
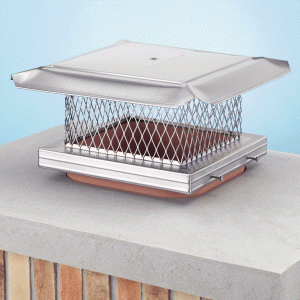
Cap screening
Flue caps that have a screening that protects the flue from dirt, and debris. It can clog and reduce draft efficiency so it must be cleaned to a suitable state.
Repairing a flue cap, regardless of the issue can be solved with a little information and practice.
 A chimney pipe helps get rid of smoke coming from a stove or fireplace. The pipe must be build p...
 A chimney flashing is used to prevent leaks in the roof around the chimney. Installing this impo...
 Chimney cowls cover the entrance to the chimney, preventing small animals, rain or debris from e...
 There are many things you need to take in consideration when building a fireplace in your home. ...
 If you prepare food on a grill frequently, then the chimney charcoal starter is the thing for yo...
 Chimney leakage is mainly caused by poor insulation or by improper roofing of the area around th...
 A chimney barbecue starter is a very effective way of lighting a fire for a barbecue. It is esse...
 A very important part of the chimney is the chimney flashing. If you spot leaks, it is probably ...